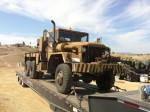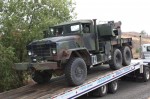
The delivery trouble that I had last Friday turned out to be a temporary little speed bump, and I got my new M923 5-ton 6×6 truck today! All is squared away with the towing company, and I’m likely to use their services again.
The tow truck driver (he’s the manager of the company, as well) was able to start and drive the truck in the GL (Government Liquidation) yard in Barstow, and this was quite fortunate because he says that the trucks were all packed in there like sardines. If he wasn’t able to drive it, then he would have spent hours dragging it into position where he could load it onto his Landoll tilt-bed trailer. The power steering came in handy then, too!
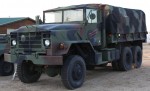
When he arrived at the end of the pavement about a quarter mile from my home, he correctly realized that it’d be silly to drag his low-bed over-the-road rig over my local rough dirt roads when his load is a well-running off-road tactical truck. So, he offloaded at a convenient clearing, called me up for the go-ahead, and drove the truck the rest of the way to my property. It was delightful to see that giant beast driving up the road to my property!
… Read More!